Virtual Environments
- Default Conda Environment
- Creating a Python 2.7 Environment
- Creating a TensorFlow Environment
- Creating and using a Development Environment
You may be wondering:
1. Default Conda Environment
Here is a graphical representation of what you have when you start out using conda:
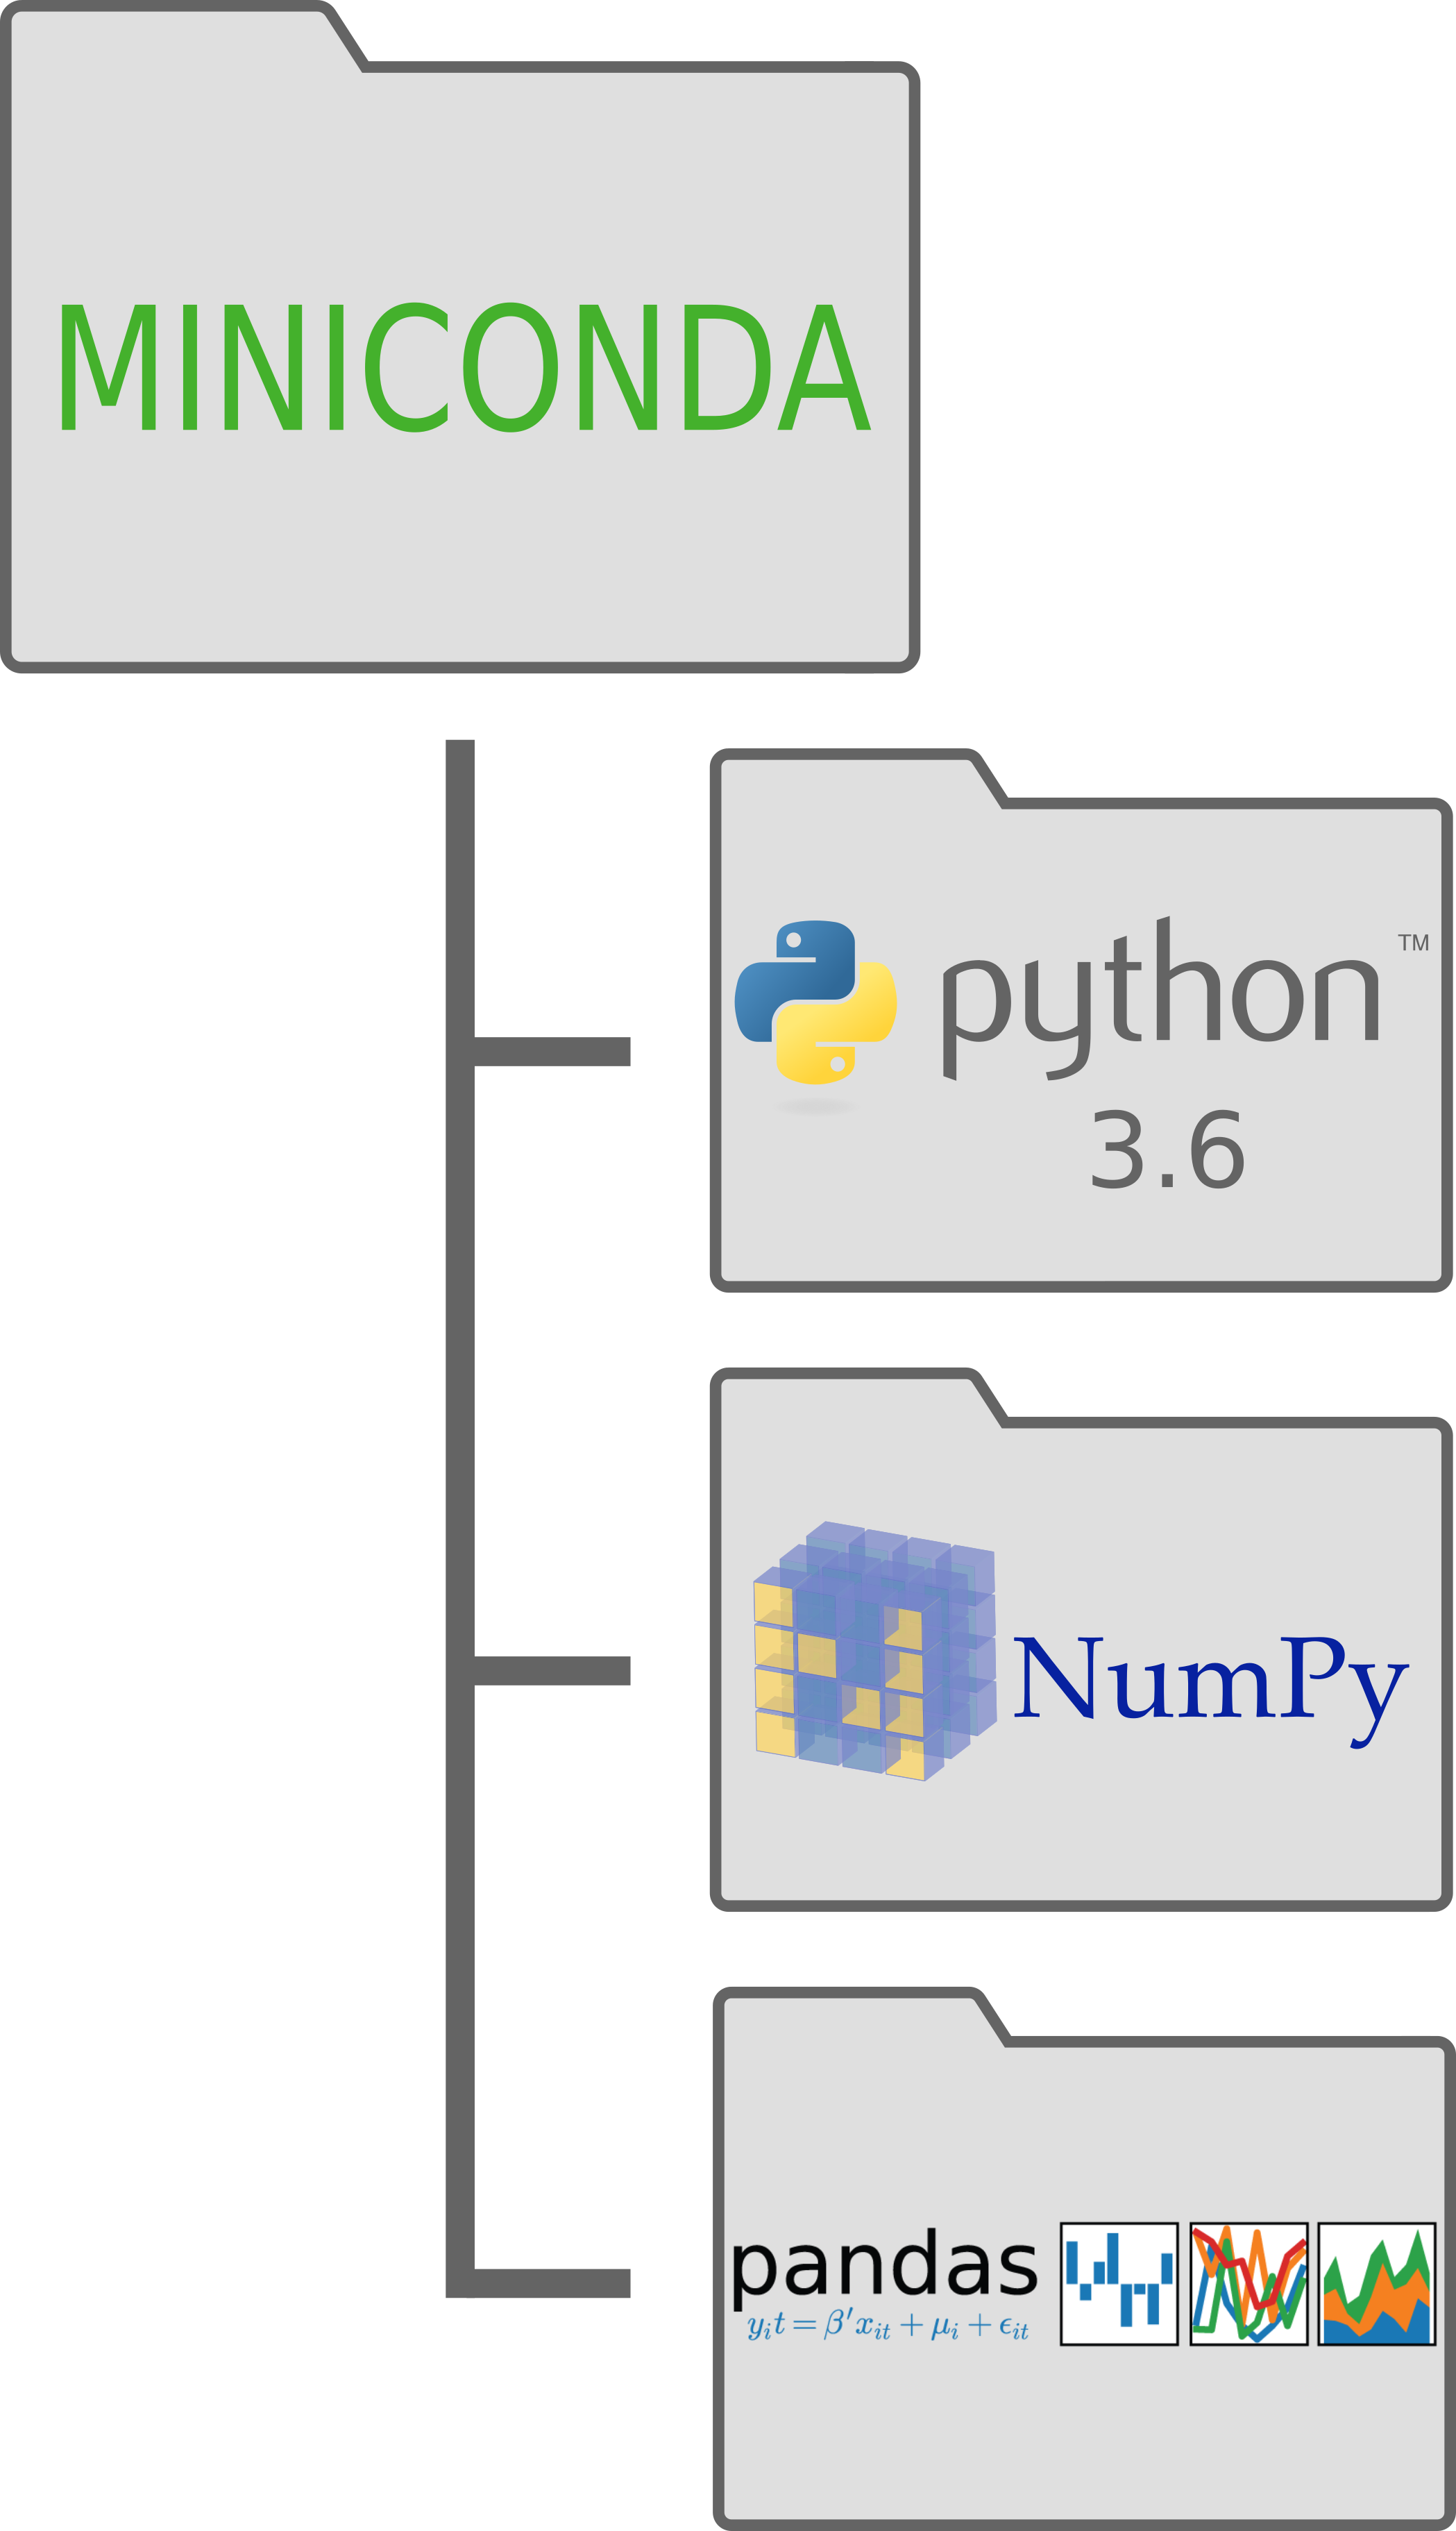
This is your default python environment. It uses python 3.6 and has any packages that we’ve installed using either the pip or conda commands.
2. Creating a Python 2.7 Environment
This is all well and good, but what if you need to use python 2.7 for a particular application or problem? This is an excellent opportunity to use a virtual environment in conda. A virtual environment creates a copy of your miniconda environment with a specific python version and only the packages you want.
This is how you create a virtual environment using conda:
conda create -n python2 python=2.7 matplotlib pandas
The field after -n is the name of your environment, the python= flag is where you specify your python version, and you can add package names that you already have installed in your default miniconda.
Here is the result of creating our python 2.7 virtual environment:

In order to use this environment you will have to activate it:
# Old conda
source activate python2

# New conda
conda activate python2
And when you want to switch back to your default:
# Old conda
source deactivate

# New conda
conda deactivate
3. Creating a TensorFlow Environment
Now say that you want to install TensorFlow, but you don’t want to accidentally kill your default python by installing it or you want to make sure that you can easily uninstall it later. A virtual environment is great for this purpose too.
conda create -n Tensorflow python=3.6 numpy
Now activate the environment
conda activate Tensorflow
Then install tensorflow
pip install tensorflow
Now you’re available environments will look like this:

4. Creating and using a Development Environment
One more reason that you might want a virtual environment is for developing your own packages. Say you’ve got a package called “test” that you want to test out as you develop it. Create a virtual environment with the packages you need and then install your package with pip in editable mode.
# Create the environment
conda create -n Test python=3.6 pandas matplotlib

# Activate this new environment
conda activate Test

# Then install your local package
pip install -e /path/to/your/package/test
Now your available environments will include your test development environment.

What is a virtual environment?
A virtual environment is a self-contained version of Python and specified packages. When you switch to a different virtual environment conda points to that python installation and installed packages. A package installed globally but not in that virtual environment won’t show up.
Why would you want a virtual environment?
Virtual environments are a good way to protect yourself. Say you accidentally install or delete something, if you’re in a virtual environment you can delete it and start over without reinstalling Python.